The installation and usage methods of Mac and Windows are basically the same. This blog post uses Mac as an example. If you encounter any problems during installation, you can contact me anytime through the "About Me" section of the blog.
Installing Trojan-qt5
Trojan-qt5 comes from this open-source project(the original author has been invited to tea), but the project is currently no longer being updated.
The last updated version (v1.4) can be found in this repo or can be downloaded from this site.
First open the downloaded Trojan-Qt5-macOS.dmg and drag Trojan-QT5 into the Applications folder.
Click to view animation
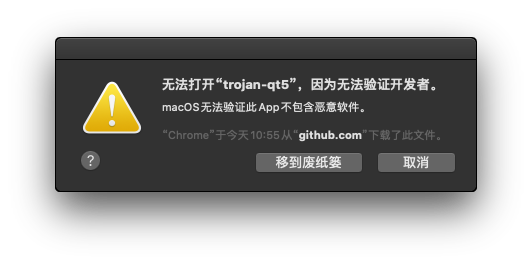
For systems above OSX 10.15, directly opening the client will prompt that the developer cannot be verified. Follow the steps below to open the client.
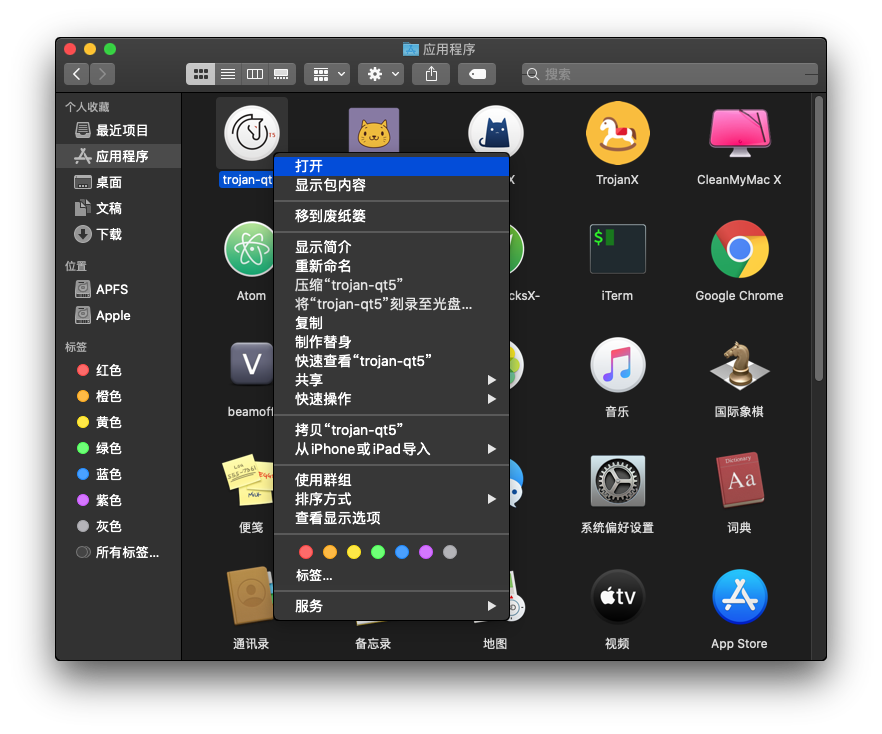
In the Applications folder, find the Trojan-QT icon, right-click, and select Open.
The first time you open it, it will prompt that the developer cannot be verified. Click Cancel, then right-click and select Open again.
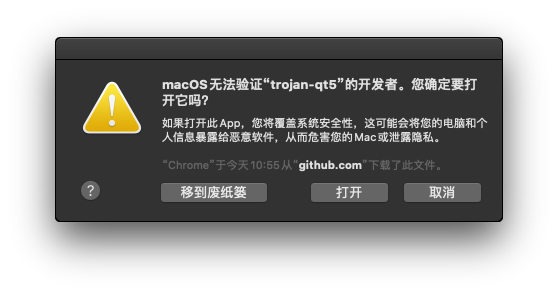
In the new popup, select Open, and the client will start. You can see the Trojan-QT5 icon in the top right corner.
Note: When there are too many icons in the Mac menu bar, the Trojan-QT5 icon may be hidden. Usually, going back to a software with fewer options in the top left corner (such as Finder) can solve this issue.
Icons hidden due to too many icons
Icons visible after removing some icons
Pro tip: Hold command and drag the icon to change its position, preventing it from being hidden.
Configuring Trojan-qt5 Subscription
VPN service providers generally provide multiple nodes at once, and the configuration for each node is quite long, so they will be sent to users in the form of subscription links.
The subscription link contains the configuration information of all server nodes and is encrypted by the Base64 algorithm. When there are changes in the server information, users only need to update the subscription to get the new server configuration.
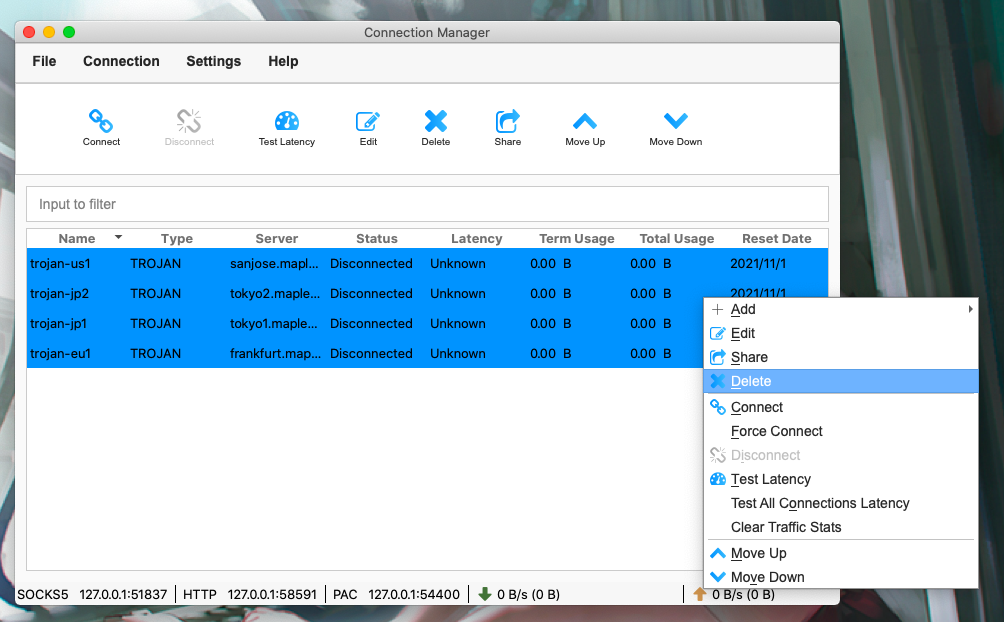
1. Delete Nodes Obtained from Previous Subscriptions Using This Link
Trojan-qt5 does not automatically delete old nodes when subscribing. Therefore, if the previous servers are deleted in the new subscription, the old (expired) nodes will still be retained in the client.
delete-nodes.png
2. Add Subscription Settings
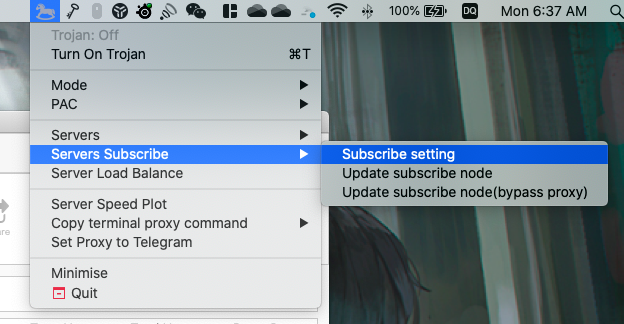
First, go to the subscription settings interface Taskbar Icon » Server Subscription » Subscription Settings
subscribe-setting-1
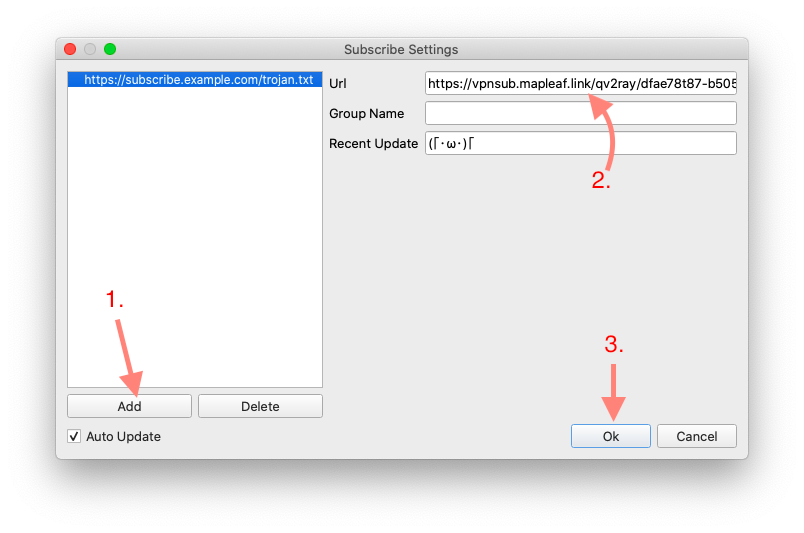
Click Add » Paste Subscription Link » Click Ok
subscribe-setting-2
Update Subscription
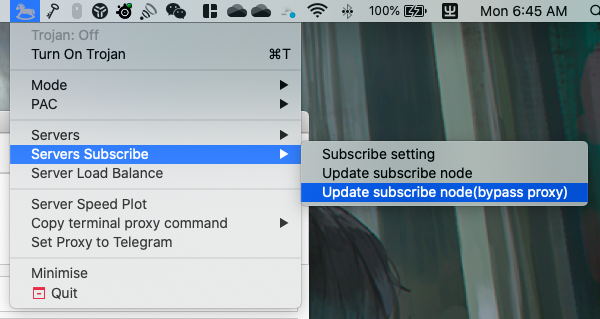
Taskbar Icon » Server Subscription » Update Server Subscription (Non-Proxy)
update-subscribe-1
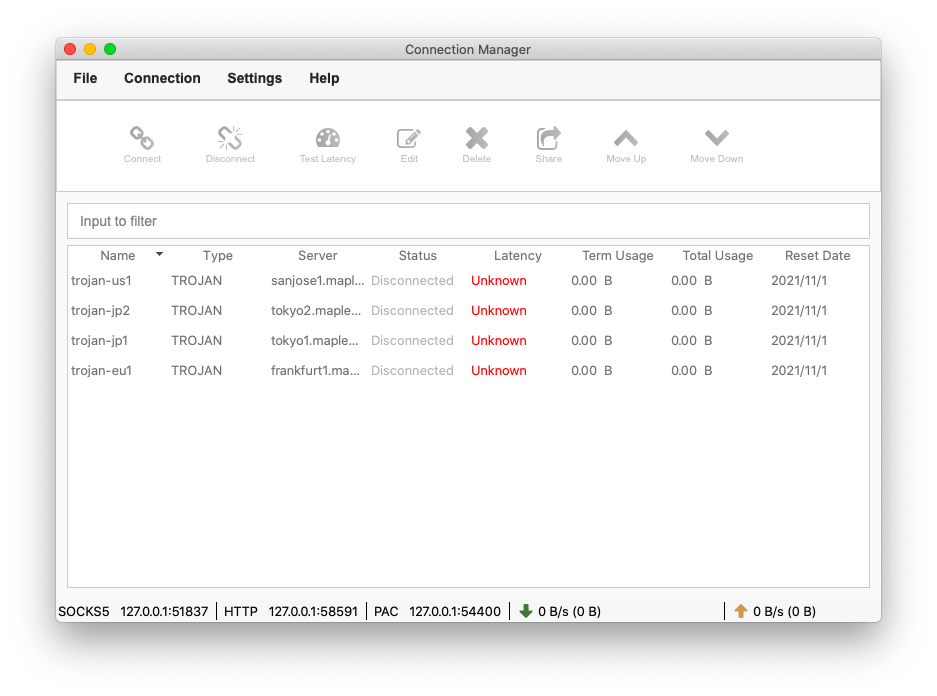
After a successful update, the server nodes will appear in the node list.